ZennをGithub連携してVSCodeで書き始める環境の構築
前提
- Githubアカウントを作成済み
- Zennアカウントを作成済み
- Docker、VSCodeをインストール済み
- VSCodeにDevcontainerをインストール済み
環境構築手順
Githubのページでの作業
- こちらから、Githubリポジトリを作成
- Repository nameを入力、Privateにチェックを入れてリポジトリを作成する
Zennのページでの作業
- こちらから、Zennにログイン
- こちらから(または右上のアカウントをクリックして「Githubからのデプロイ」を選択して)、Github連携のページを開く
- 「リポジトリを連携する」をクリックし、Only select repositoriesを選択、前節1.で作成したリポジトリを選択し、「Install &Authorize」をクリック
ローカルでの作業
- 連携したリポジトリをclone
$ git clone <repository-url> - VSCodeでcloneしたディレクトリを開く
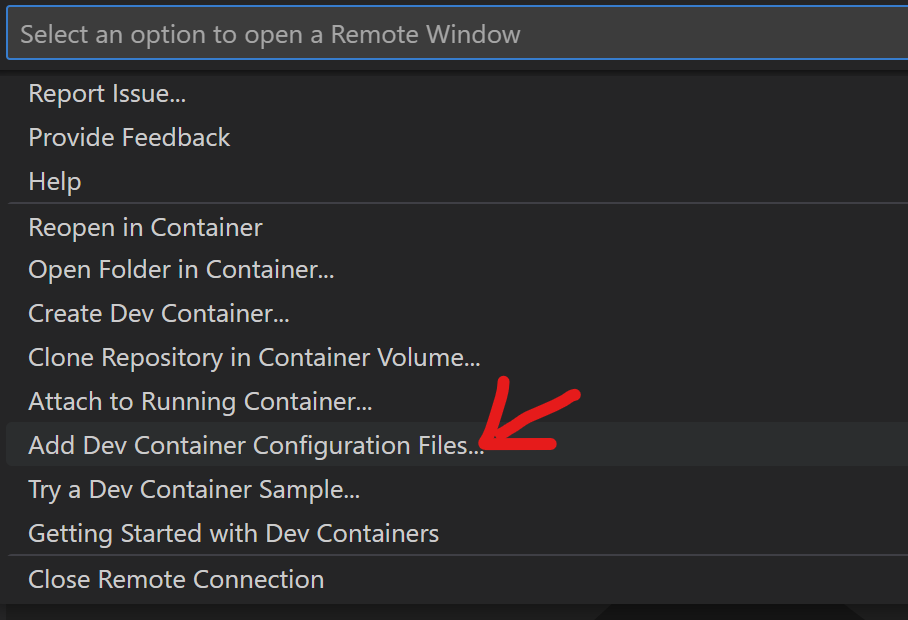
- 左下の「><」ボタンをクリックし、「Add Dev Container Configuration Files…」をクリック
- Ubuntuを選択、defaultのversionを選択する
- Nodeにチェックを入れて「OK」をクリック

- .devcontainerフォルダとdevcontainer.jsonが作成されたことを確認
- devcontainer.jsonの
postCreateCommandのプロパティ(18行目)を下記のように編集して保存
// For format details, see https://aka.ms/devcontainer.json. For config options, see the // README at: https://github.com/devcontainers/templates/tree/main/src/ubuntu { "name": "Ubuntu", // Or use a Dockerfile or Docker Compose file. More info: https://containers.dev/guide/dockerfile "image": "mcr.microsoft.com/devcontainers/base:jammy", "features": { "ghcr.io/devcontainers/features/node:1": {} }, // Features to add to the dev container. More info: https://containers.dev/features. // "features": {}, // Use 'forwardPorts' to make a list of ports inside the container available locally. // "forwardPorts": [], // Use 'postCreateCommand' to run commands after the container is created. "postCreateCommand": "npm install -y zenn-cli", // Configure tool-specific properties. // "customizations": {}, // Uncomment to connect as root instead. More info: https://aka.ms/dev-containers-non-root. // "remoteUser": "root" } - 左下の「><」ボタンをクリックし、「Open Folder in Container…」をクリック
- コンテナのビルドが成功したら、VSCode上部のTerminal > New Terminalでターミナルを開く
- .gitignoreファイルを作成し、下記を追記
node_modules
.devcontainer
- ターミナルで下記のコマンドを実行する
$ npx zenn new:article - articlesフォルダと記事の.mdファイルが作成されることを確認
- ここまででディレクトリ構成は下図の通り
📁 repository
    📄 .gitignore
    📄 package-lock.json
    📄 package.json
    📁 articles
        📄 xxxxxxxxxxx.md
    📁 node_modules
    📁 .devcontainer
        📄 .devcontainer.json
記事のプレビューを確認
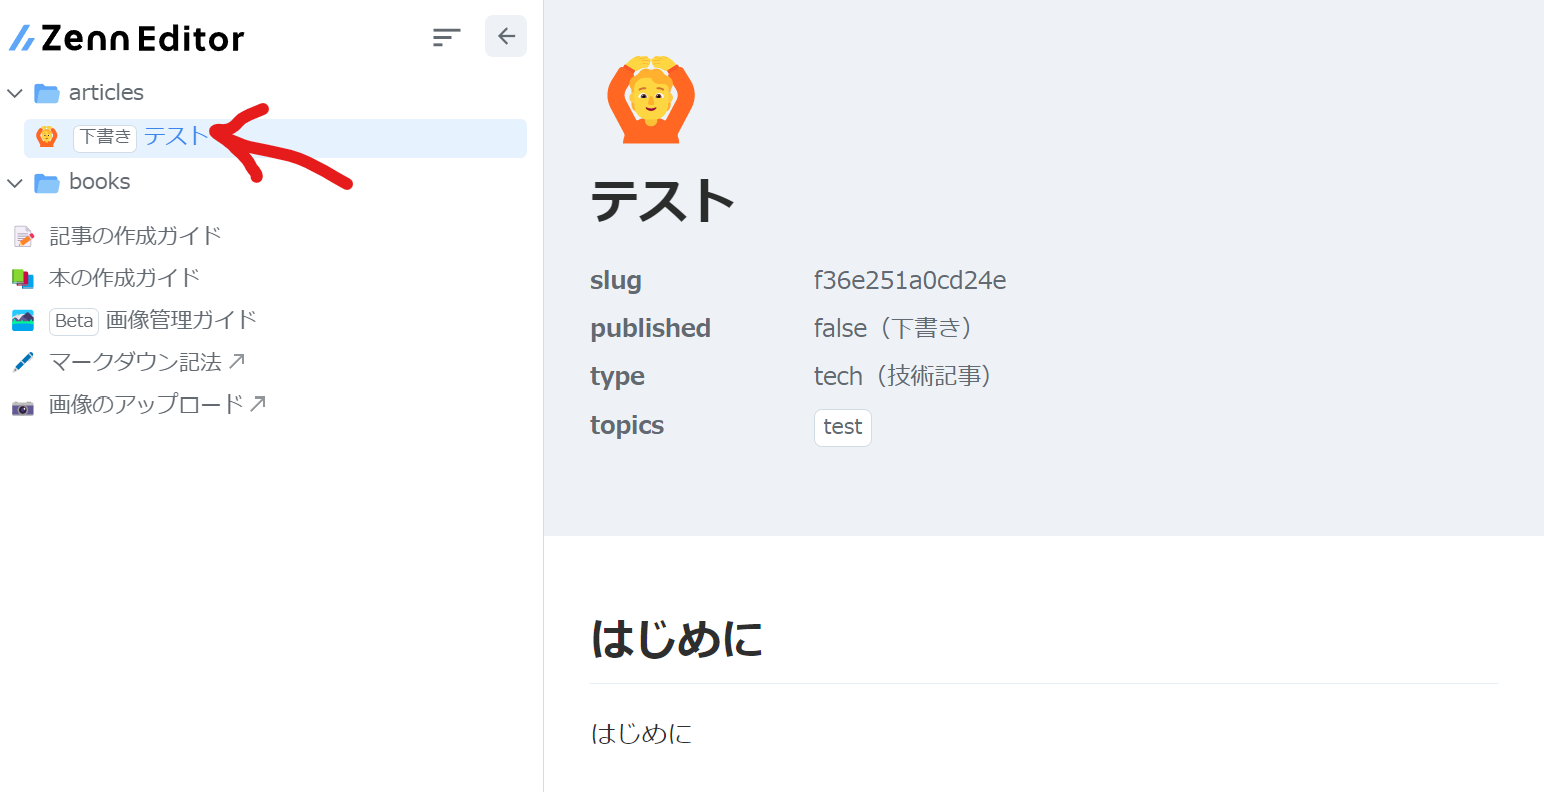
- 前節11.で作成した.mdファイルをテスト用に編集する
- 例えば下記のような感じ(publishedはfalseに設定する)
---
title: "テスト"
emoji: "🙆"
type: "tech" # tech: 技術記事 / idea: アイデア
topics: ["test"]
published: false
---
# はじめに
はじめに
- 例えば下記のような感じ(publishedはfalseに設定する)
- 下記コマンドでプレビューを起動
$ npx zenn preview - 右下に出てくるアラートで「Open in Browser」をクリック

- 作成した記事がプレビューできていることを確認
- (ローカルでcommitしてpushする)
$ git add .$ git commit -m "first commit"$ git push -u origin master
記事を公開する
- 前節1.のpublishedをtrueにしてcommit、Githubにpushすると公開される